Handmade Paper Made Easy!
Make your own, unique handmade paper at home!
The colour, size and thickness of this paper is entirely up to you, and can be used for a variety of projects including card making.
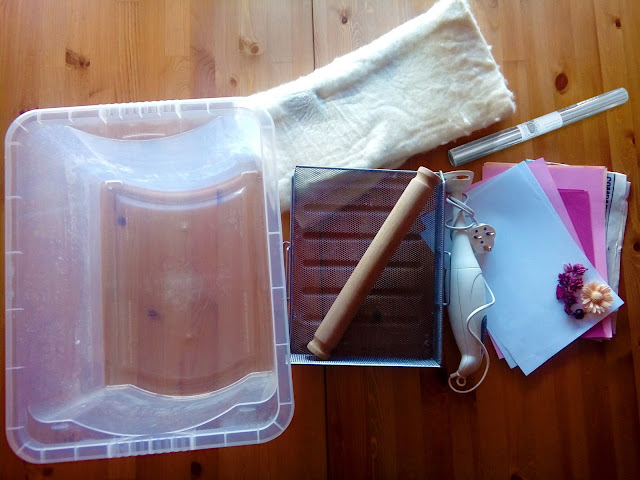
You will need:
A deep storage tub or bucket, a handheld blender, a rolling pin, sheets of thick felt, tin foil, a wire mesh tray and multiple sheets of paper (your choice of colours). You can add in extra pieces later such as flowers, potpourri, petals etc.
The wire mesh does not need to be a tray, it just needs to be flat. The smaller the holes in the material the better - the holes in chicken wire would be too big.
Firstly you'll need to pour some cold water into your tub. The water needs to be deep enough so that the blades of the blender can be entirely submerged.
Tear up your paper into small pieces. Use a shredder if you have one, it's much quicker!
Blend your paper until it looks like a pulp mixture in the water.
There should be quite a thick layer on the surface. If it looks a little thin, just add more torn paper and blend again.
Place your wire tray into the water, and allow the paper mixture to collect on top. Slowly pull the tray from the water, allowing the paper to cover the whole area evenly. There should be no gaps. If there are, place the tray back into the water and try again. Add more torn paper if needed.
Now you can add in any extras that you would like in your paper - I used some potpourri which I crushed and sprinkled on top.
Cut a piece of foil to fit the length and width of the wire tray, and place it on top of your paper.
Cut a sheet of felt to fit your tray and place that on top of the foil. With one hand holding the felt, use your other hand to turn the tray upside. Keep your one hand on the felt and gently tap the wet paper so that it falls away from the wire mesh.
Position the rest of your felt on top of the paper, and use your rolling pin to flatten your paper.
Move the paper still attached to the foil to somewhere flat and out of the way, and leave to dry for several days. The drying time will vary depending on how thick you made your paper.
You can probably make a least one more sheet out of the paper you already have in the tub, or you can keep adding more paper if you'd like to made multiple sheets in one go.
Once your paper has started to dry at the edges, you can carefully peel it away from the foil. You can then either leave to dry fully for another day or so more, or use a hairdryer for quicker results!
Only once completely dry, you can cut your paper to your desired size. Cutting it while still damp will not give you straight edges and may tear the paper.
And there you have it, your very own handmade paper!
The colour combinations are endless, and once you've made one you'll want to keep trying new ideas!
I've got some food to share with you next week, so stay tuned!
Sian


Comments
Post a Comment